Rodin Gen-1 AI 3D Model Generator: Turn Your Ideas into Reality
If you've ever struggled to bring the creative visions in your mind to life in 3D, or want to create consistent 3D images, then you need to check out Rodin Gen-1! This groundbreaking tool allows you to create stunning 3D models with just a simple text prompt—no complicated software or technical skills required. That's the magic of Rodin Gen-1.
What is Rodin Gen-1?
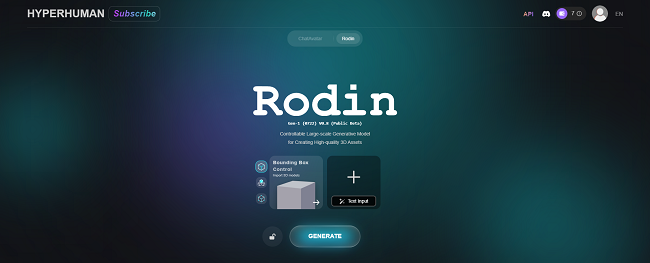
Rodin Gen-1 is a practical 3D generation model developed by the Yingmo team. It utilizes the Diffusion Transformer (DiT) architecture and boasts over 1.5 billion parameters, enabling it to generate high-quality 3D models. With Rodin Gen-1, you can create 3D models with PBR (Physically Based Rendering) textures in just a few seconds.
Key Features
- Parameter Count: With over 1.5 billion parameters, Rodin Gen-1 is equipped to generate complex and detailed 3D models.
- Rapid Generation: The process from concept to visualization is extremely fast, allowing you to quickly create 3D models.
- PBR Textures: Supports Physically Based Rendering (PBR) textures, ensuring the generated 3D models are visually realistic and highly detailed.
Rodin Gen-1 is capable of generating high-quality 3D models suitable for various applications, including animation, game development, virtual reality, and more.
How to Use Rodin Gen-1
Step 1: Register and Obtain Credits
Sign up for the Rodin Gen-1 platform. New users receive 10 credits upon registration and an additional 30 credits with a 7-day free Creator membership.
Step 2: Enter a Text Prompt
Type your text prompt into the Rodin Gen-1 input box. If you're new to writing text prompts, don't worry! You can use prompts from others as a reference and let the AI help you refine them. While Rodin Gen-1 might not perfectly match every detail of your prompt just yet, its creative results are already quite practical.
Step 3: Generate a 2D Image
Based on your text prompt, the system will generate a 2D image. If you're not satisfied, you can regenerate it as many times as you like without consuming credits.
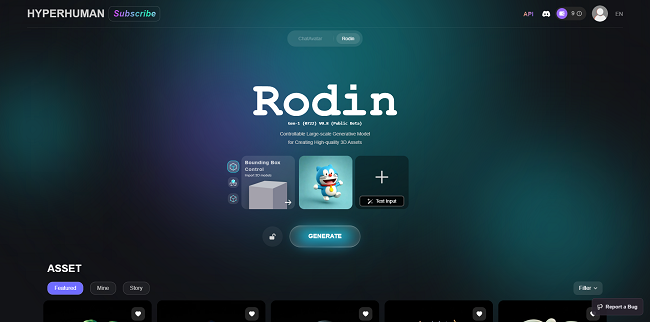
Step 4: Convert to a 3D Model
Once you're happy with the image, click "GENERATING" to create a rough 3D model.
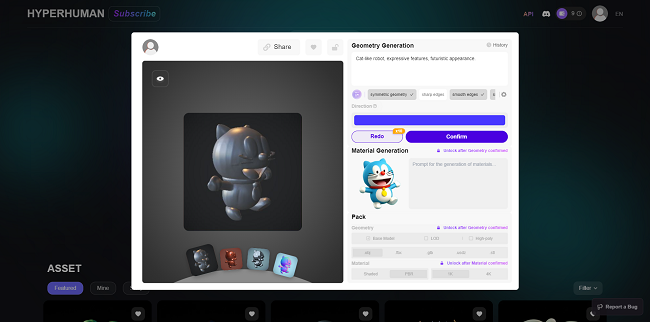
Step 5: Adjust Model Settings
In the top right corner, choose the model's symmetry, edge type (sharp or smooth), and whether to use a simple geometric mode.
Step 6: Confirm the Model
Review the generated 3D model. If you're not satisfied, click "redo" to regenerate it. Once you're happy, select "confirm" to proceed to the next step.
Step 7: Choose Polygon Count and Output Settings
Select the polygon count for the output model, which will start consuming credits.
Step 8: Generate Textures
Choose the complexity of the texture and the influence of reference images to generate PBR textures.
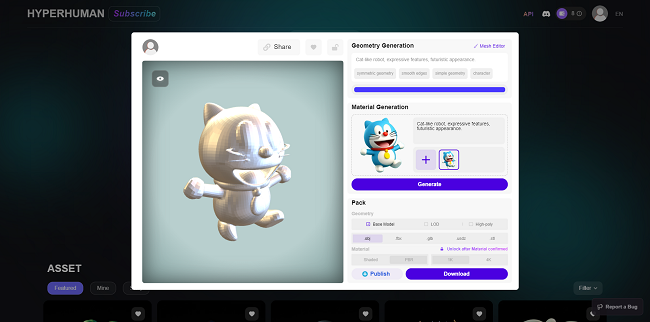
Step 9: Confirm the Texture
After the texture is generated, preview it in the left panel. If you're satisfied, click "confirm."
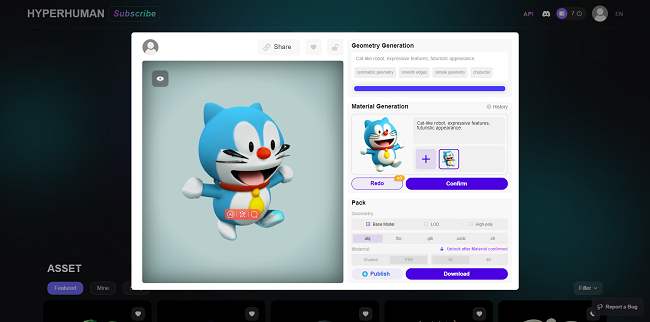
Step 10: View and Select Display Modes
In the left preview area, select different display modes to view the model and ensure it meets your expectations.
Step 11: Download the Model
Once the model and textures are finalized, select the desired format and specifications to download. The download package usually includes the model in OBJ format and PBR texture files.
Step 12: Further Use
Use the downloaded 3D model for further editing, animation, or 3D printing, depending on your project's needs.
Also Read: How to Convert 2D to 3D Image with ComfyUI
The Potential of AI-Generated 3D Models
From entertainment to education and commercial applications, AI-generated 3D models have vast potential. They can be used for teaching aids, theme parks, exhibitions, tech demonstrations, product showcases, personalized merchandise, toys and dolls, collectibles, interactive storybooks, online avatars, animation and film production, VR and AR experiences, game development, advertising, and marketing. The possibilities are endless, catering to the innovative needs of users across different fields.
Conclusion
Rodin Gen-1 opens the door to a world where creativity and reality blend seamlessly, like a magical pocket filled with endless possibilities. We are no longer children searching for a bamboo-copter, but creators painting our dream 3D worlds on a digital canvas, making every imagined thing within reach.

