
A Comprehensive Guide: Convert 2D to 3D Image with ComfyUI
In the world of digital image processing and generation, converting 2D images into 3D has always been a hot topic. With advancements in technology and the continuous refinement of tools, this process has become increasingly simple and efficient. In this blog, we'll dive into how you can use ComfyUI to convert a 2D image into a 3D one, offering you detailed workflow steps and node information to help you achieve this goal effortlessly.
Introduction to ComfyUI
ComfyUI is a powerful image-processing tool that supports various nodes and custom scripts, allowing users to create complex image generation and processing workflows. With its flexible node configurations and intuitive interface, users can easily tackle tasks ranging from simple image adjustments to complex image generation.
Workflow Overview
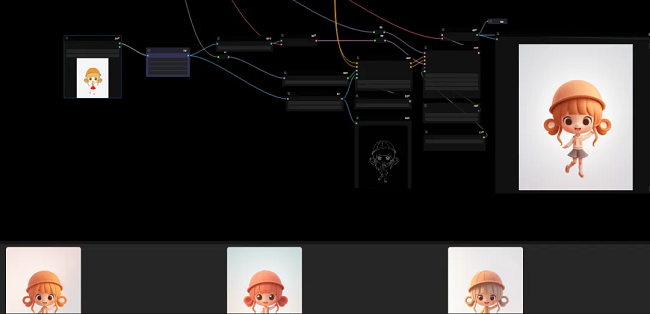
To convert a 2D image into a 3D image, we'll be using the following nodes and checkpoint configurations:
Primitive Nodes (14)
- KSampler
- CLIPSetLastLayer
- CheckpointLoaderSimple
- PreviewImage
- SaveImage
- VAEDecode
- ControlNetApplyAdvanced
- RepeatImageBatch
- LoadImage
- VAEEncode
- VAELoader
- CLIPTextEncode
- LoraLoader
- DiffControlNetLoader
Custom Nodes (4)
- ComfyUI-Easy-Use
- ComfyUI-Custom-Scripts
- ComfyUI-Inference-Core-Nodes
- cg-use-everywhere
Checkpoints (1)
- helloip3dV13/V13E/7268
Loras (1)
- KIDS ILLUSTRATION/COOLKIDS V2
Unknown Nodes (2)
- easy setNode
- DF_Image_scale_to_side
How to Use ComfyUI to Convert 2D to 3D Images
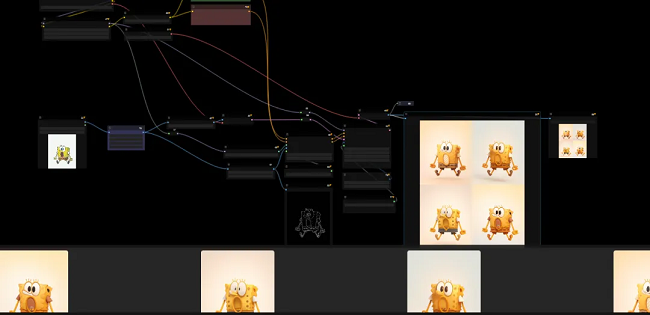
Step 1: Load the 2D Image
To start, we'll load the 2D image using the 'LoadImage' node. This node allows you to select and load the image you wish to convert. Whether it's a landscape, portrait, or cartoon illustration, you can import it into the workflow through this node. Once the image is loaded, the next step is to preprocess it to ensure it's suitable for the subsequent 3D conversion steps. The 'VAEEncode' node can be used to encode the image, reducing data size while retaining key features.
Step 2: Set Basic Parameters
Before generating the 3D image, we need to set some basic parameters. Using the 'VAELoader' node, we can load a pre-trained VAE model, which helps enhance the quality of the generated image. Then, we'll use the 'VAEEncode' node to encode the image and apply advanced settings with the 'ControlNetApplyAdvanced' node. This step ensures that the generated 3D image accurately reflects the characteristics of the input 2D image.
Step 3: Load Text and Models
To further enhance the image, we'll encode text using the 'CLIPTextEncode' node, load models with the 'CheckpointLoaderSimple' node, and apply a Lora model using the 'LoraLoader' node. These nodes assist in generating a more detailed and depth-rich 3D image.
Step 4: Generate the 3D Image
At this stage, we'll generate the 3D image using the 'KSampler' and 'VAEDecode' nodes. These nodes work through sampling and decoding processes, transforming the previously encoded image information into a 3D image.
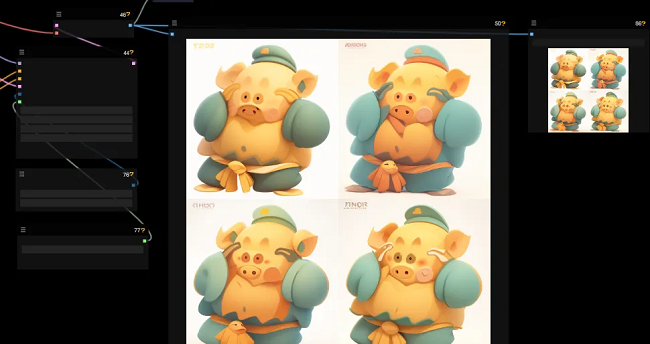
Step 5: Preview and Save
Finally, use the 'PreviewImage' node to preview the generated 3D image. If satisfied with the result, you can save the final 3D image locally using the 'SaveImage' node.
Custom and Unknown Nodes
To ensure smooth workflow operation, we also used the following custom nodes:
- ComfyUI-Easy-Use
- ComfyUI-Custom-Scripts
- ComfyUI-Inference-Core-Nodes
- cg-use-everywhere
These custom nodes provide additional features and flexibility, enabling the workflow to better accommodate various needs and scenarios. Additionally, we utilized two unknown nodes:
- easy setNode
- DF_Image_scale_to_side
Although the specific functions of these nodes are not entirely clear, they play a crucial role in the workflow, particularly in handling image scale and detail.
Checkpoints and Lora
We used the following checkpoints and Lora:
- Checkpoints: helloip3dV13/V13E/7268
- Loras: KIDS ILLUSTRATION/COOLKIDS V2
These checkpoints and Lora models provide strong support for our 3D image generation, ensuring that the final images boast higher quality and detail.
In-Depth Analysis and Application Scenarios
By following the steps above, you can easily convert 2D images into 3D images. This process leverages ComfyUI's powerful features and flexible workflow, making image conversion quick and efficient. Here are some practical application scenarios:
1. Animation Production
In animation production, there's a high demand for 3D images. By converting 2D images into 3D images, animators can quickly generate the necessary materials, boosting their work efficiency.
2. Game Development
In game development, 3D models are essential. Using ComfyUI to convert 2D images into 3D images can help game developers quickly create realistic game scenes and characters.
3. Education and Training
In education and training, 3D images can be used for various purposes, such as virtual experiments and simulation training. By converting 2D images into 3D images, educational institutions can provide more vivid and intuitive teaching resources.
4. Architecture and Interior Design
Architects and interior designers can use 3D images for design and presentation. By converting 2D images into 3D images, designers can better present design concepts, helping clients understand the design intent more clearly.
Conclusion
We hope this detailed guide helps you master the technique and steps for converting 2D images into 3D images using ComfyUI. Whether you're an animator, game developer, educator, or designer, this workflow can help you achieve efficient image processing and generation.