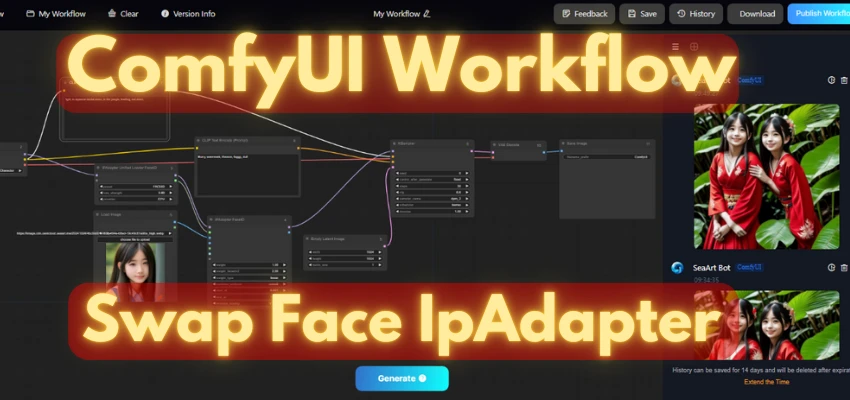
ComfyUi Workflow (Quick Tool) Basic "Face Swap by Text Image"
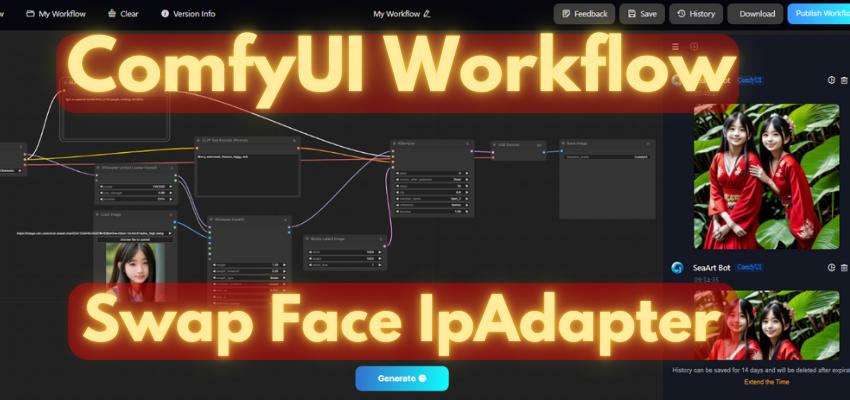.jpeg)
ComfyUI/Quick Tool Workflow: Face Detector/IP Adapter on SeaArt.ai
In this tutorial, we will explore how to create a seamless face-swapping tool using the ComfyUI framework on SeaArt.ai. By following the step-by-step workflow, we will integrate the IP Adapter FaceID system with model checkpoints and text prompts to generate realistic face-swapped images. This guide is perfect for those looking to leverage AI tools to create dynamic, high-quality images.
Step-by-Step Workflow
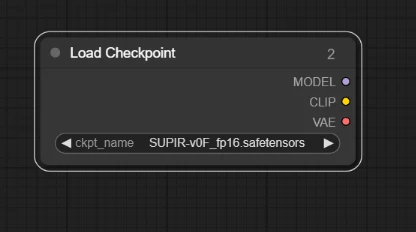
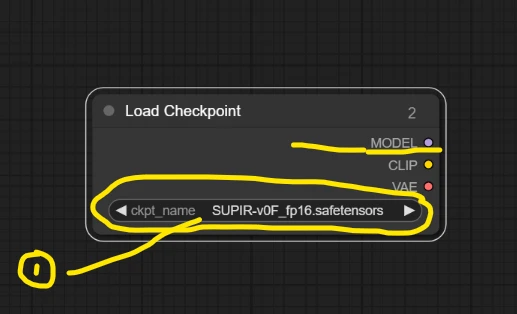
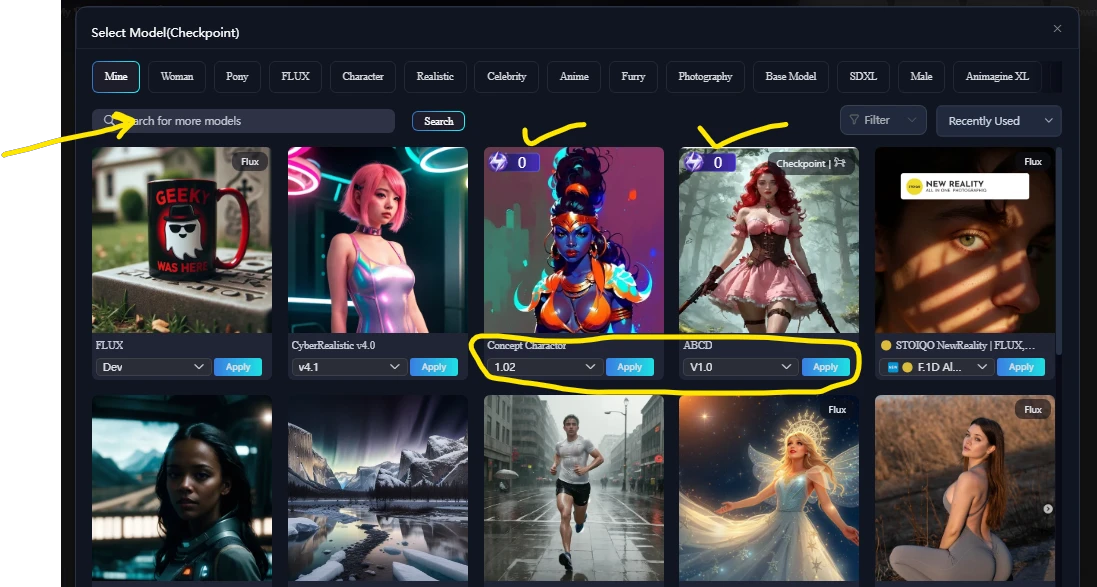
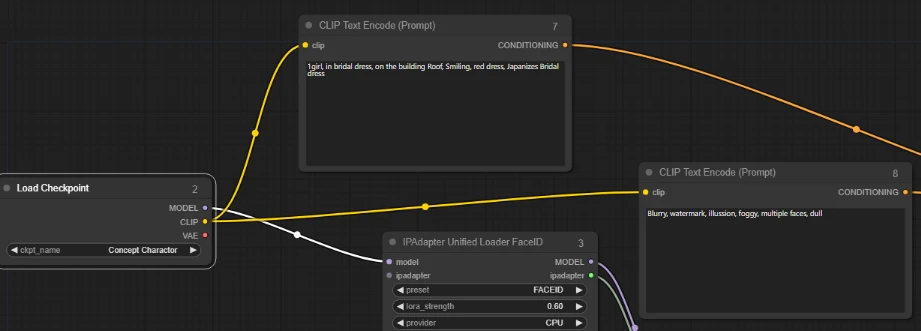
1. Load Checkpoint
Start by loading the pre-trained model checkpoint you want to work with. This is a critical foundation that ensures the network understands the image structure it’s about to work on.
- Go to the "Load Checkpoint" node in ComfyUI.
- Select the model you want to base your image generation on.
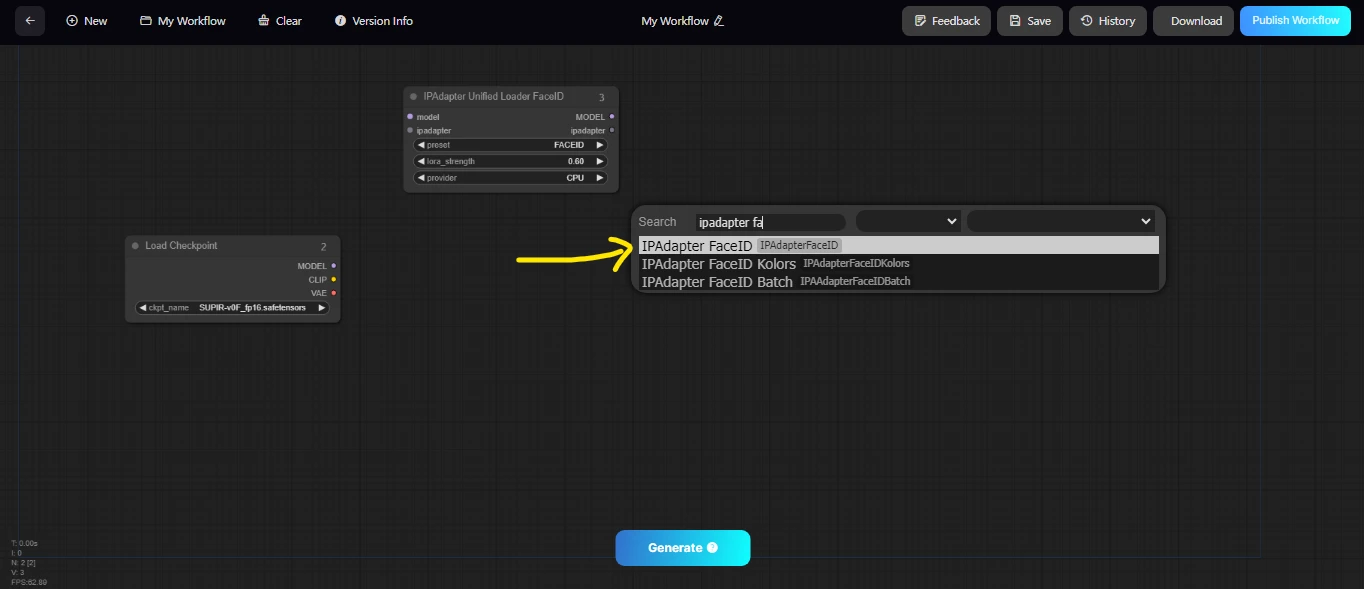
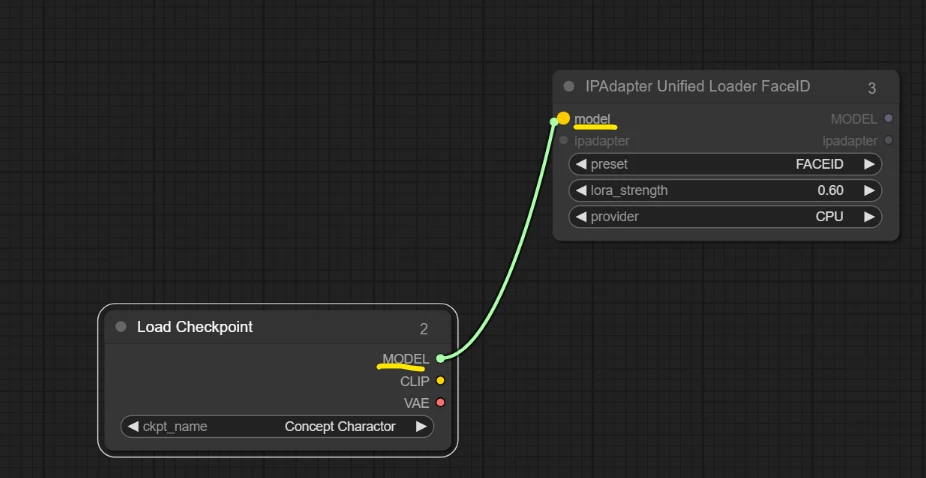
- Doubled click on screen to find directly as in image.You can load any model you required.
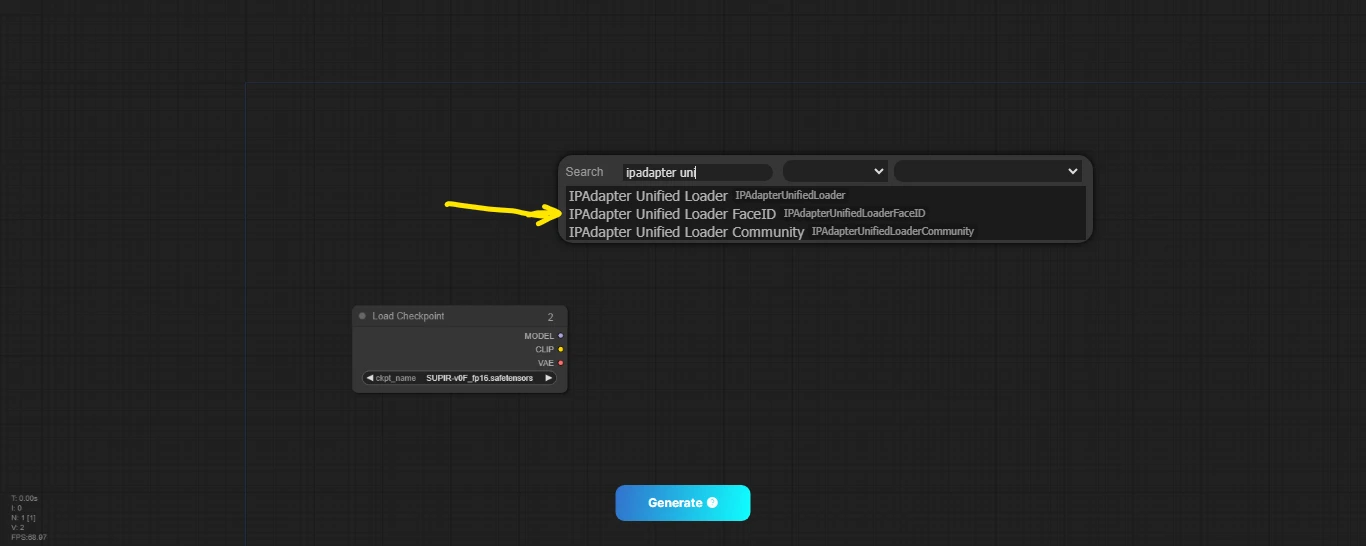
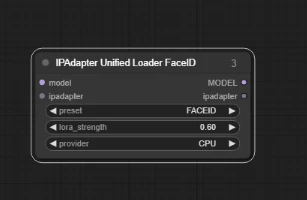
2. IPAdapter Unified Loader
Next, we integrate the IPAdapter Unified Loader. This tool provides a base for incorporating an adapter model that allows you to use IP-based identification for image processing.
- Add the IPAdapter Unified Loader node.
- This loader should correspond to your task, such as face detection, for identity-preserving transformations.(Example Image)
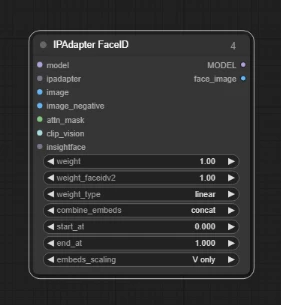
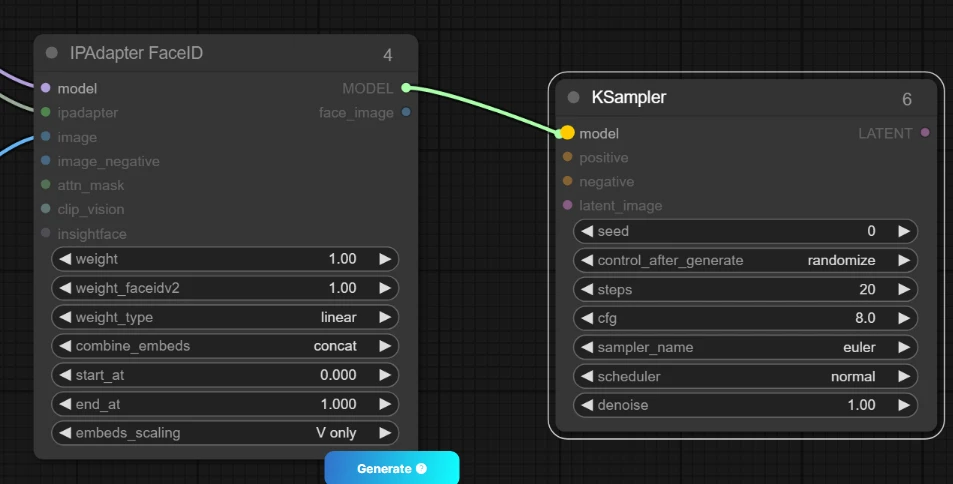
3. IPAdapter FaceID (Controller Points)
IPAdapter FaceID is used for detecting and controlling facial features via keypoints. These keypoints will help us maintain facial consistency during the image swap.
- Connect the IPAdapter FaceID node, ensuring that the Controller Points are mapped according to your design.
4. Load Model (Any Model Required)
Depending on your intended output, load an additional model. This model will work in conjunction with your checkpoint and adapter.
- Add the "Load Model" node and choose your required model.
- Ensure it complements the type of image you are generating, such as photorealistic, stylized, or 3D-rendered images.
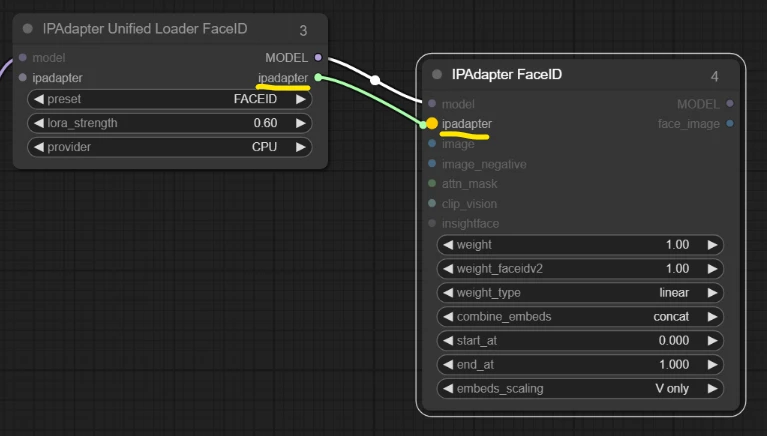
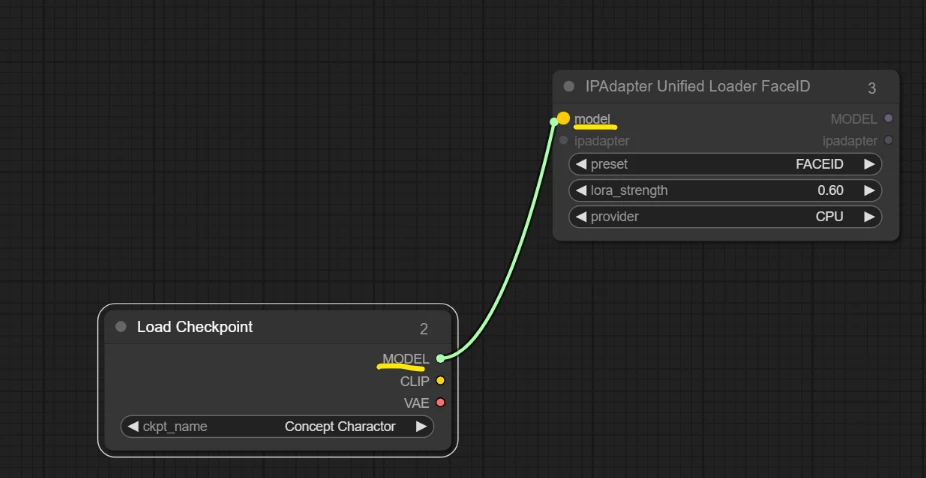
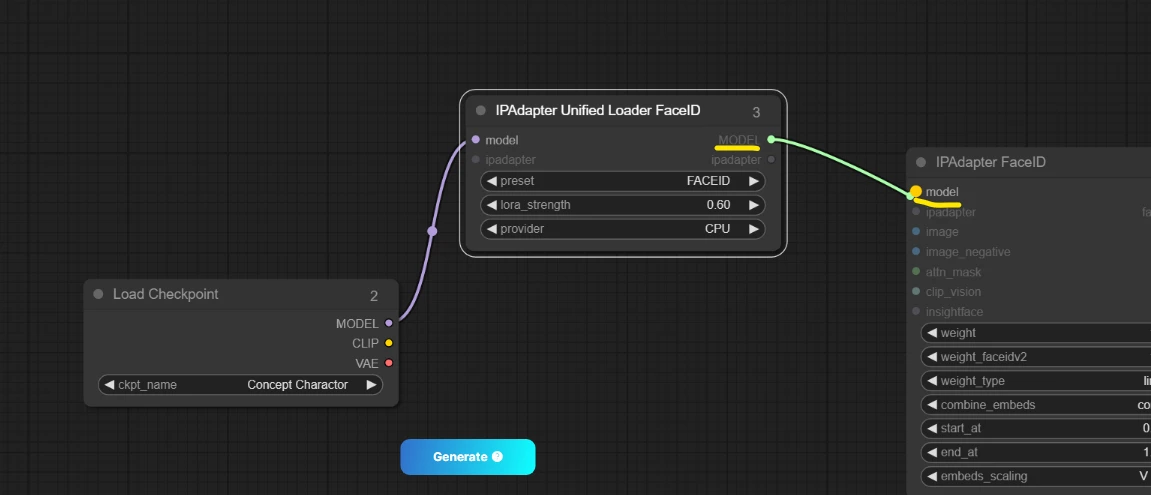
5. Connect Nodes (Model to Model, IPAdapter to IPAdapter)
Now, connect the various nodes to establish the workflow pipeline:
- Model → Model: Connect your base model and the auxiliary model for an efficient workflow.
- IPAdapter → IPAdapter: Connect IPAdapter nodes, ensuring seamless data transmission.
6. Load Image (Upload Image of Face Close-Up)
For face-swapping to work effectively, you'll need a clear, close-up image of the target face.
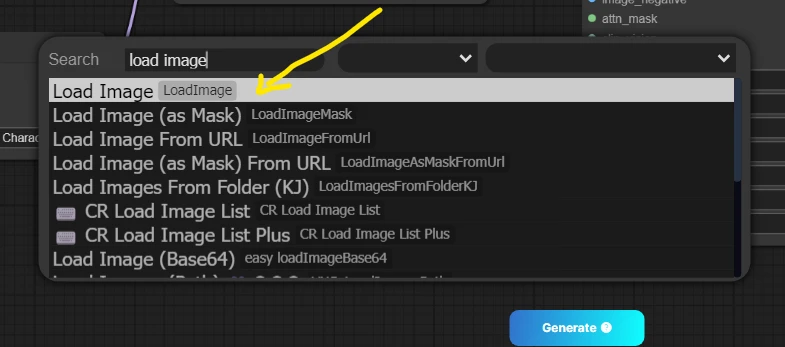
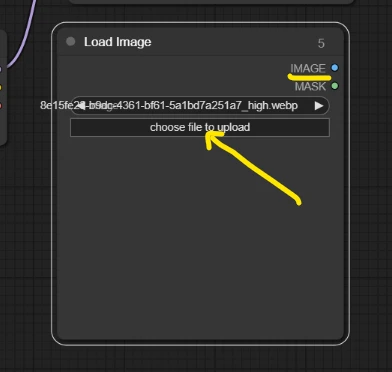
- Use the "Load Image" node.
- Upload an image featuring a close-up of the face you want to swap.
7. Connect Node (Image to Image)
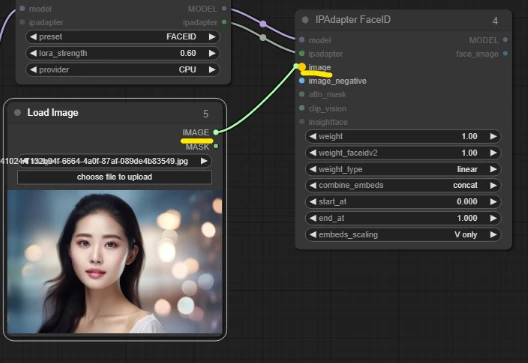
Connect your uploaded image to the image processing node:
- Link Image → Image, ensuring the image data flows into the adapter.
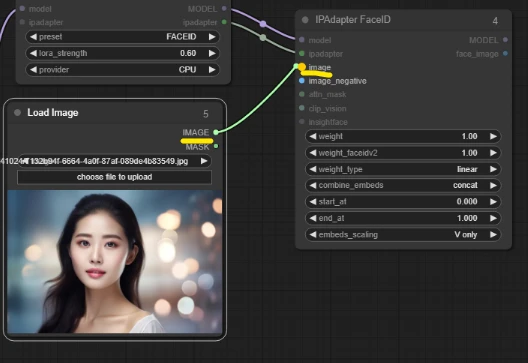
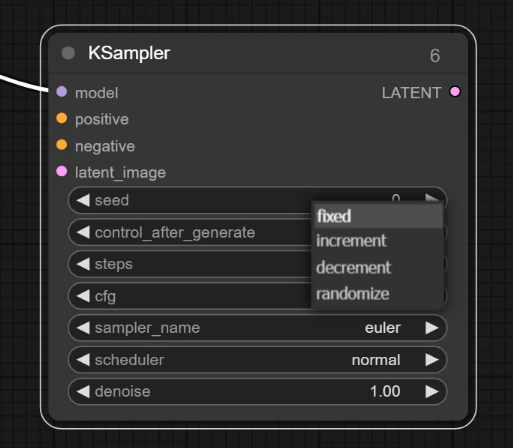
8. KSampler (Controller Point)
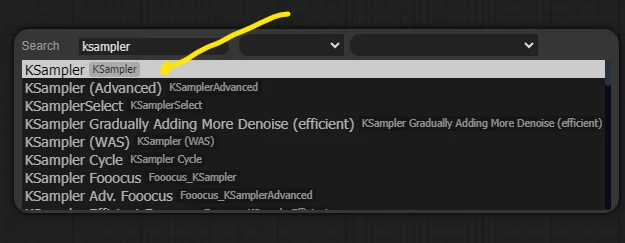
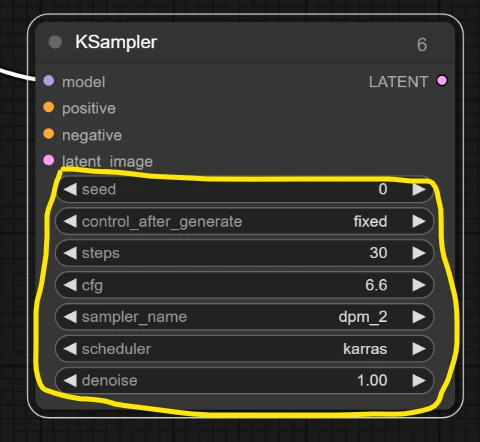
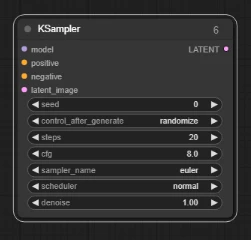
Add the KSampler node for sampling variations. The KSampler ensures control over generated image properties, like resolution or facial details.
- Make sure the controller points are linked correctly to maintain consistency in your sampled images.*Example Image for Controller
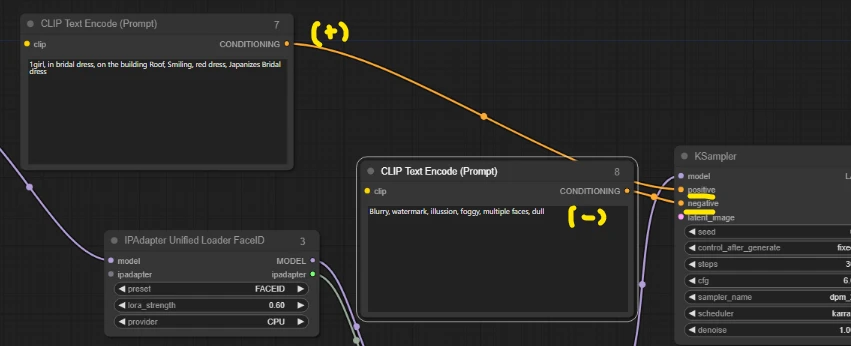
9. Clip TEXT Encode (For Positive & Negative Prompts)
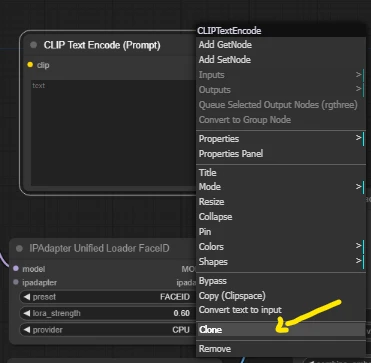
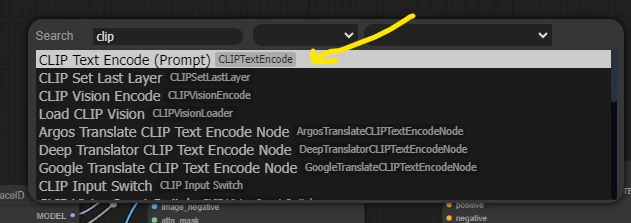
In this step, we’ll encode text prompts. Positive prompts define features you want the model to emphasize, and negative prompts exclude certain features from the generation process.
- Clip Text Encode (Positive): Input phrases like “woman with bright eyes” or “smiling face.”
- Clip Text Encode (Negative): Enter phrases like “no beard,” “no glasses” if you want to avoid these features.*Clone the Node for Negative Text clip
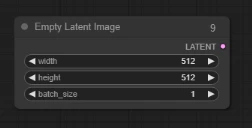
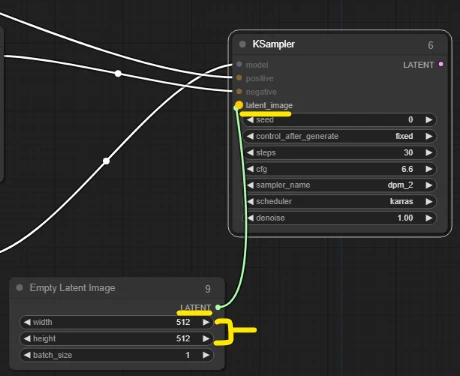
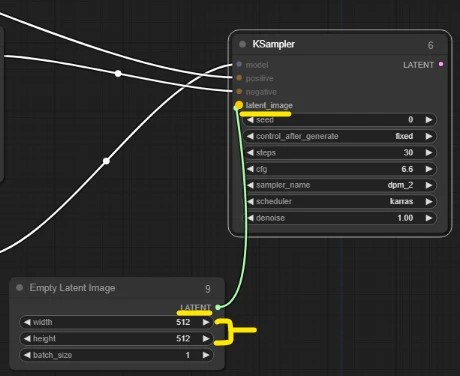
10. Empty Latent Image (For Image Size)
The Empty Latent Image node defines the size of the output image.
- Specify the dimensions of the latent space where the image will be processed.*Size you can adjust as you required

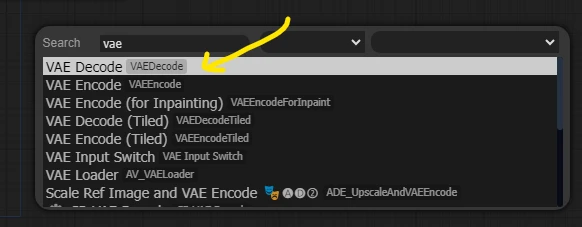
11. VAE Decode (Decode Processed Latent Image into Real Image)
The VAE Decode node decodes the latent image into a viewable, realistic image output.
- Connect it to the latent image node, so it can decode and convert processed images into high-quality, final images.*Combine Codes to convert into Image
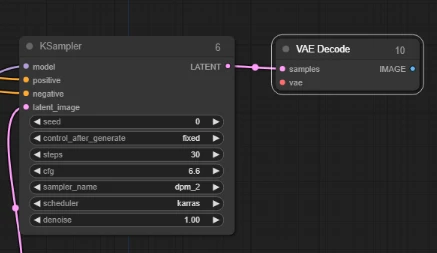
12. Connect Nodes (Latent to Latent, VAE to VAE, Image to Image)
Ensure all the final connections between latent images, VAEs, and other image-processing nodes are properly established:
- Latent → Latent, VAE → VAE, Image → Image, etc.
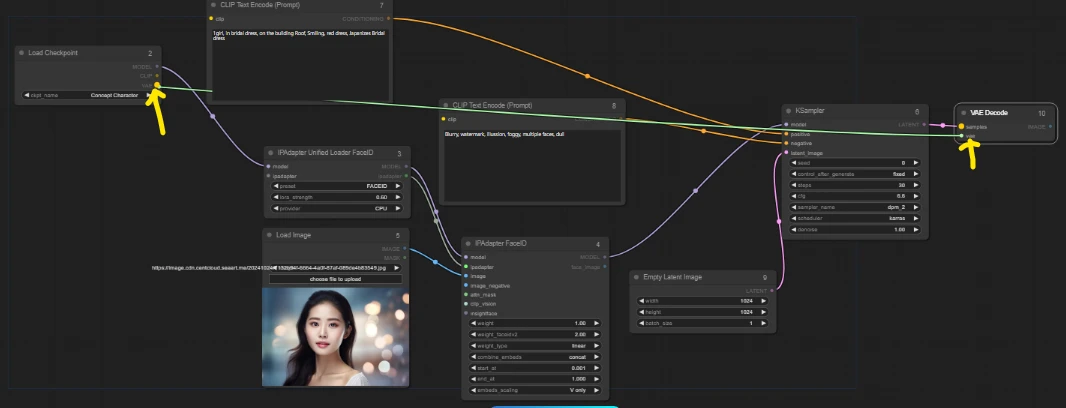
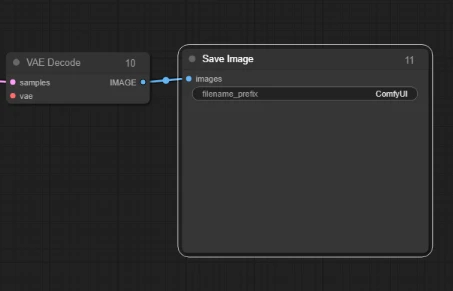
13. Save Image
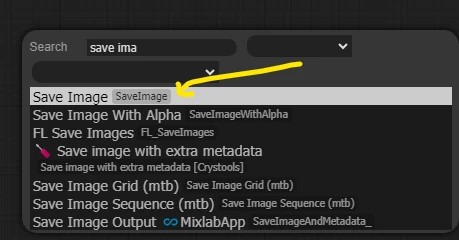
Once your workflow has run, save the generated image.
- Use the "Save Image" node to store your final output in a chosen directory.
14. Generate
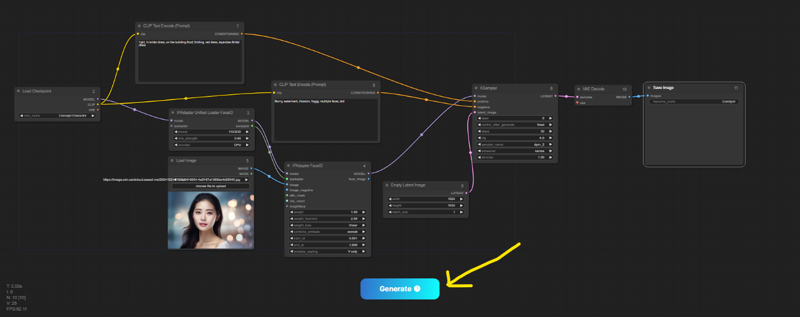
After all nodes are connected and the workflow is properly set up, hit Generate to produce your face-swapped image.
15. Publish Workflow
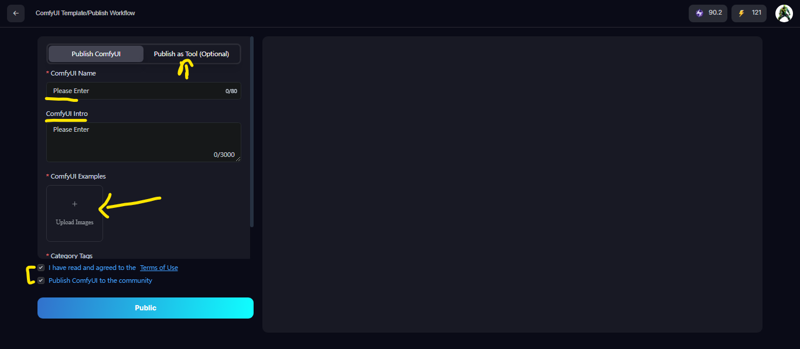
Once satisfied with your results, you can publish the workflow on SeaArt.ai for others to use.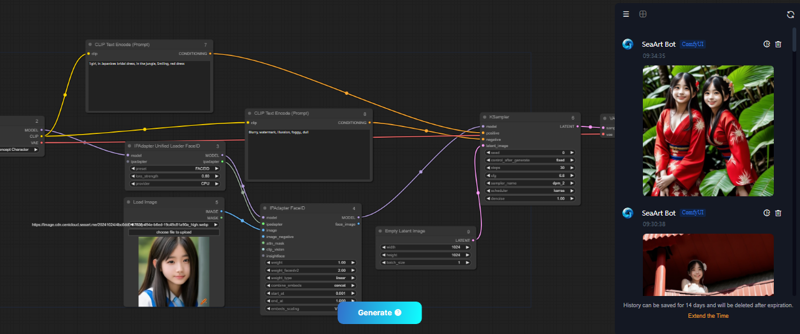

A. Name Your Workflow
Give your workflow an identifiable name, such as “Swap Face by Text Image.”
B. ComfyUI Intro
Provide an introduction explaining how this workflow leverages ComfyUI's flexibility to create a face-swapping tool.
C. ComfyUI Examples
Include example images generated using this workflow to showcase its capabilities.
D. Tags
Add relevant tags like Swap Face, Women, etc., to improve discoverability.
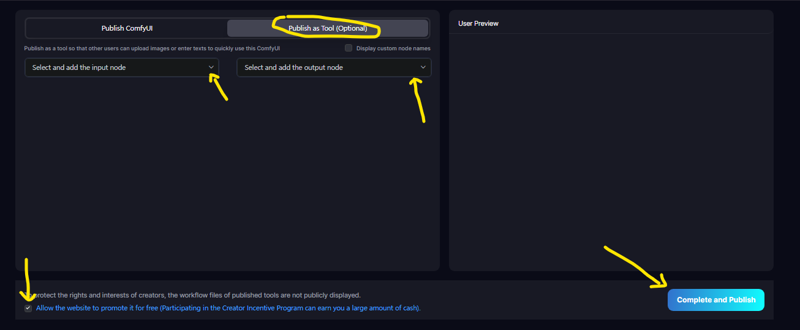
16. Publish As Tool (Optional)
You may also choose to publish the workflow as a standalone tool on SeaArt.ai, making it accessible to a broader audience. Simply select Publish and Save to finalize.
 *Example Image
Completion
You’ve now completed the face-swapping workflow using the ComfyUI framework. Your tool is ready to generate impressive face-swapped images based on text prompts and input images.

Final Thoughts
By leveraging the IPAdapter and ComfyUI's nodes in a structured workflow, you can create powerful image manipulation tools like face-swapping by simply using text and images. This process, once understood, can be modified for numerous creative uses in image generation.
You Can Download/Use my Own QuickTook : https://www.seaart.ai/workFlowAppDetail/csct9lle878c73ei6e2g
Written by : Ghulam Mujtaba Seaart.ai ID(4484d0afff39c208d87f47602ad469b2)
Ghulam Mujtaba invites you to use SeaArt.AI - an AI tool that helps you with easy art creation!


